When you try to remove a
domain controller from your Active Directory domain by using Dcpromo.exe and
fail, or when you began to promote a member server to be a Domain Controller
and failed (the reasons for your failure are not important for the scope of
this article), you will be left with remains of the DCs object in the Active
Directory. As part of a successful demotion process, the Dcpromo wizard removes
the configuration data for the domain controller from Active Directory, but as
noted above, a failed Dcpromo attempt might leave these objects in place.
The effects of leaving
such remains inside the Active Directory may vary, but one thing is sure:
Whenever you'll try to re-install the server with the same computername and try
to promote it to become a Domain Controller, you will fail because the Dcpromo
process will still find the old object and therefore will refuse to re-create
the objects for the new-old server.
In the event that the
NTDS Settings object is not removed correctly you can use the Ntdsutil.exe
utility to manually remove the NTDS Settings object.
If you give the new
domain controller the same name as the failed computer, then you need perform
only the first procedure to clean up metadata, which removes the NTDS Settings
object of the failed domain controller. If you will give the new domain
controller a different name, then you need to perform all three procedures:
clean up metadata, remove the failed server object from the site, and remove
the computer object from the domain controllers container.
You will need the
following tool: Ntdsutil.exe, Active Directory Sites and Services, Active
Directory Users and Computers.
Also, make sure that you
use an account that is a member of the Enterprise Admins universal group.
Caution: Using the
Ntdsutil utility incorrectly may result in partial or complete loss of Active
Directory functionality.
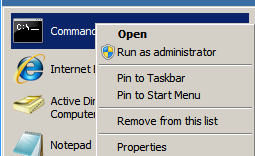
To clean up metadata
1.
At the command line,
type Ntdsutil and press ENTER.
C:\WINDOWS>ntdsutil
ntdsutil:
2. At the Ntdsutil: prompt, type metadata cleanup
and press Enter.
ntdsutil: metadata cleanup
metadata cleanup:
3. At the metadata cleanup: prompt, type
connections and press Enter.
metadata cleanup: connections
server connections:
4. At the server connections: prompt, type connect
to server <servername>, where <servername> is the domain controller
(any functional domain controller in the same domain) from which you plan to
clean up the metadata of the failed domain controller. Press Enter.
server connections: connect to server server100
Binding to server100 ...
Connected to server100 using credentials of locally logged on
user.
server connections:
Note: Windows Server
2003 Service Pack 1 eliminates the need for the above step.
5. Type quit and press Enter to return you to the
metadata cleanup: prompt.
server connections: q
metadata cleanup:
6. Type select operation target and press Enter.
metadata cleanup: Select operation target
select operation target:
7. Type list domains and press Enter. This lists
all domains in the forest with a number associated with each.
select operation target: list domains
Found 1 domain(s)
0 - DC=dpetri,DC=net
select operation target:
8. Type select domain <number>, where
<number> is the number corresponding to the domain in which the failed
server was located. Press Enter.
select operation target: Select domain 0
No current site
Domain - DC=dpetri,DC=net
No current server
No current Naming Context
select operation target:
9. Type list sites and press Enter.
select operation target: List sites
Found 1 site(s)
0 -
CN=Default-First-Site-Name,CN=Sites,CN=Configuration,DC=dpetri,DC=net
select operation target:
10. Type select site <number>, where
<number> refers to the number of the site in which the domain controller
was a member. Press Enter.
select operation target: Select site 0
Site -
CN=Default-First-Site-Name,CN=Sites,CN=Configuration,DC=dpetri,DC=net
Domain - DC=dpetri,DC=net
No current server
No current Naming Context
select operation target:
11. Type list servers in site and press Enter. This
will list all servers in that site with a corresponding number.
select operation target: List servers in site
Found 2 server(s)
0 - CN=SERVER200,CN=Servers,CN=Default-First-Site-Name,CN=Sites,CN=Configuration,DC=dpetri,DC=net
1 -
CN=SERVER100,CN=Servers,CN=Default-First-Site-Name,CN=Sites,CN=Configuration,DC=dpetri,DC=net
select operation target:
12. Type select server <number> and press
Enter, where <number> refers to the domain controller to be removed.
select operation target: Select server 0
Site -
CN=Default-First-Site-Name,CN=Sites,CN=Configuration,DC=dpetri,DC=net
Domain - DC=dpetri,DC=net
Server -
CN=SERVER200,CN=Servers,CN=Default-First-Site-Name,CN=Sites,CN=Configuration,DC=dpetri,DC=net
DSA object - CN=NTDS
Settings,CN=SERVER200,CN=Servers,CN=Default-First-Site-Name,CN=Sites,CN=Configuration,DC=dpetri,DC=net
DNS host name - server200.dpetri.net
Computer object -
CN=SERVER200,OU=Domain Controllers,DC=dpetri,DC=net
No current Naming Context
select operation target:
13. Type quit and press Enter. The Metadata cleanup
menu is displayed.
select operation target: q
metadata cleanup:
14. Type remove selected server and press Enter.
You will receive a
warning message. Read it, and if you agree, press Yes.
metadata cleanup: Remove selected server
"CN=SERVER200,CN=Servers,CN=Default-First-Site-Name,CN=Sites,CN=Configuration,DC=dpetri,DC=net"
removed from server "server100"
metadata cleanup:
At this point, Active
Directory confirms that the domain controller was removed successfully. If you
receive an error that the object could not be found, Active Directory might
have already removed from the domain controller.
15. Type quit, and press Enter until you return to
the command prompt.
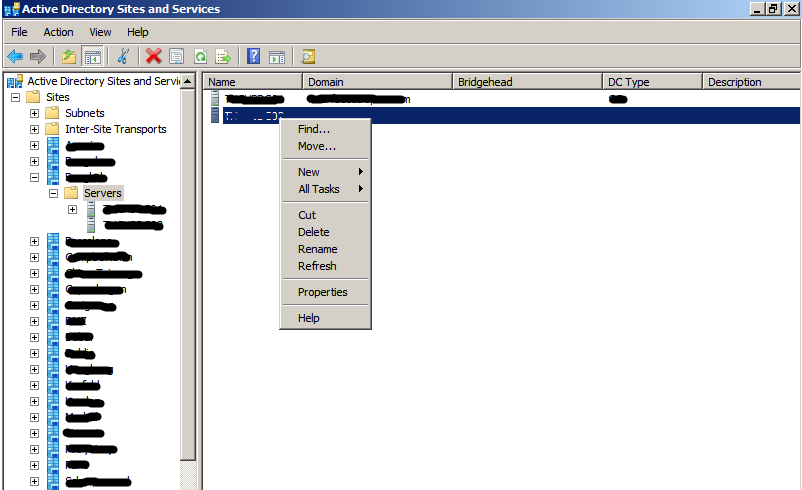
To remove the failed
server object from the sites
16. In Active Directory Sites and Services, expand
the appropriate site.
17. Delete the server object associated with the
failed domain controller.
To remove the failed
server object from the domain controllers container
18. In Active Directory Users and Computers, expand
the domain controllers container.
19. Delete the computer object associated with the
failed domain controller.
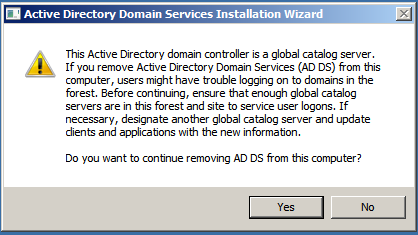
20.Windows Server 2003 AD might display a new type of question
window, asking you if you want to delete the server object without performing a
DCPROMO operation (which, of course, you cannot perform, otherwise you wouldn't
be reading this article, would you...) Select "This DC is permanently
offline..." and click on the Delete button.
21. AD will display another confirmation window. If
you're sure that you want to delete the failed object, click Yes.
To remove the failed
server object from DNS
22.In the DNS snap-in, expand the zone that is related to the domain
from where the server has been removed.
23.Remove the CNAME record in the _msdcs.root domain of forest zone
in DNS. You should also delete the HOSTNAME and other DNS records.
24.If you have reverse lookup zones, also remove the server from
these zones.
Other considerations
Also, consider the
following:
·
If the removed domain
controller was a global catalog server, evaluate whether application servers
that pointed to the offline global catalog server must be pointed to a live
global catalog server.
·
If the removed DC was a
global catalog server, evaluate whether an additional global catalog must be
promoted to the address site, the domain, or the forest global catalog load.
·
If the removed DC was a
Flexible Single Master Operation (FSMO) role holder, relocate those roles to a
live DC.
·
If the removed DC was a
DNS server, update the DNS client configuration on all member workstations,
member servers, and other DCs that might have used this DNS server for name
resolution. If it is required, modify the DHCP scope to reflect the removal of
the DNS server.
·
If the removed DC was a
DNS server, update the Forwarder settings and the Delegation settings on any
other DNS servers that might have pointed to the removed DC for name resolution.


.jpg)